Back in 2015, when Microsoft launched Windows 10, they offered a tempting proposition. All Windows 7 and Windows 8 users who made the switch within the first year of Windows 10's release could enjoy a free upgrade.
However, this free upgrade offer had a deadline—July 29, 2016. After this date, Microsoft officially declared an end to the free upgrade opportunity. On the surface, it seemed like Windows 7 and Windows 8 users had missed their chance to experience the latest OS without cost.
Global market share held by operating systems for desktop PCs
As of July 2023, Microsoft's Windows continues to reign supreme as the go-to desktop operating system across the globe, commanding a whopping 70 percent of the market share.
While it's clear that Windows maintains its dominance, Apple's Mac operating system has steadily been on the rise, now accounting for roughly a fifth of the market. Meanwhile, Linux and Google's Chrome OS have managed to keep their footing with modest but stable market shares.
The evolution of Microsoft Windows is a fascinating journey that began in 1985. Along the way, it spawned several noteworthy versions, such as Windows 95, Windows XP, and Windows 7—the latest addition to the Windows family, Windows 11.
In 2022, an impressive 65 million PCs rolled out to consumers, all equipped with Windows operating systems pre-installed. Looking ahead to August 2023, the numbers continue to tell a story of dominance and change.
Windows 10 (Win10) leads the pack with a substantial 71.94 percent of the desktop market, closely followed by the newly minted Windows 11 (Win11), which has swiftly secured a commendable 23.17 percent market share. These statistics highlight the ever-evolving landscape of desktop operating systems.
Here's where it gets interesting. Despite Microsoft's declaration, resourceful users soon discovered a hidden pathway to upgrade. They realized that they could still transition from Windows 7 and Windows 8 to Windows 10 without purchasing a new product key. Windows 10 seemed surprisingly receptive to these older keys, making the upgrade process surprisingly straightforward.
Source: StatCounter Global Stats - Windows Version Market Share
This quiet loophole allowed users to continue enjoying the benefits of Windows 10 without incurring any additional expenses. Microsoft's attempt to close the door on free upgrades appeared to have a crack that users could exploit.
Windows 11: A Familiar Upgrade
Fast forward to 2021, and Windows 11 arrived on the scene. Users wondered if the same old tricks would work with this new OS. The answer was yes. Underneath its shiny new exterior, Windows 11 shared a strong resemblance to Windows 10. In essence, Windows 11 was Windows 10 with a fresh coat of paint.
This similarity meant that the older Windows 7 and Windows 8 keys still had value. Users could upgrade to Windows 11, continuing to enjoy the benefits of modernization without reaching for their wallets.
Microsoft recently announced a significant change—older Windows 7 and Windows 8 keys would no longer activate Windows 10 or Windows 11. This change took effect with the latest Windows Canary preview builds, which were testing the next major version of the Windows client due out the following year.
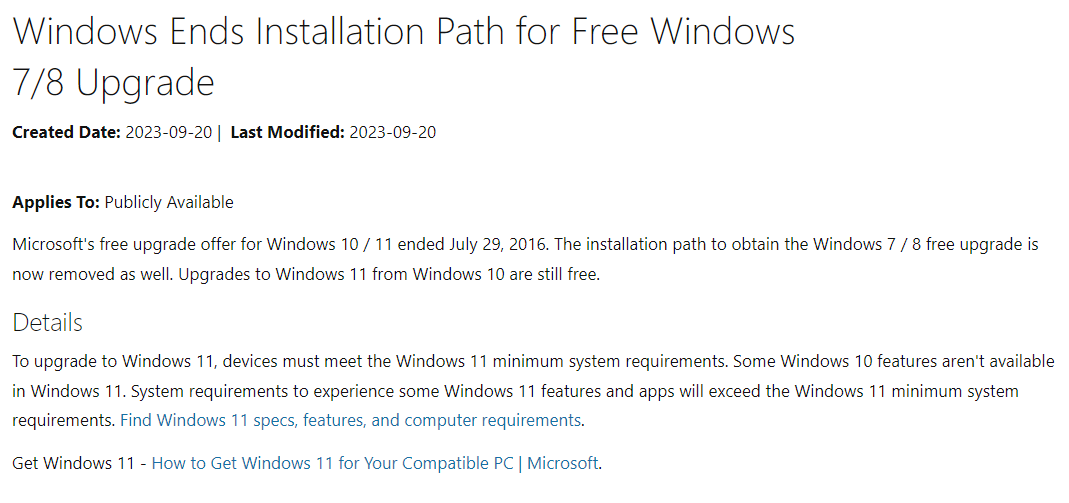
The official announcement stated: "Microsoft's free upgrade offer for Windows 10 / 11 ended July 29, 2016. The installation path to obtain the Windows 7 / 8 free upgrade is now removed as well. Upgrades to Windows 11 from Windows 10 are still free."
As of now, these older keys can still activate the production builds of Windows 11, but uncertainty looms. It remains to be seen how long this leniency will last. Microsoft asserts that Windows 10 product keys will still work to activate Windows 11 but with a catch. Your PC must be eligible and officially support the newer OS.
How to Update / Upgrade Windows 11?
Upgrading to Windows 11 is a straightforward process, and we'll walk you through it step by step. First, you can get Windows 11 directly from Microsoft for approximately $200.
How to open PC Health Check
In Windows, use Search on the taskbar to search for “PC Health Check,” then select it from the list of results.
If a PC Health Check update is available, you can quickly install it for the latest version.
If you don't have PC Health Check installed, you can install it by going to https://aka.ms/GetPCHealthCheckApp and following the prompts to download and install the app.
But before diving in, it's crucial to make sure your computer meets all the requirements set by Microsoft for this new operating system. To do that, the handy PC Health Check app comes to the rescue.
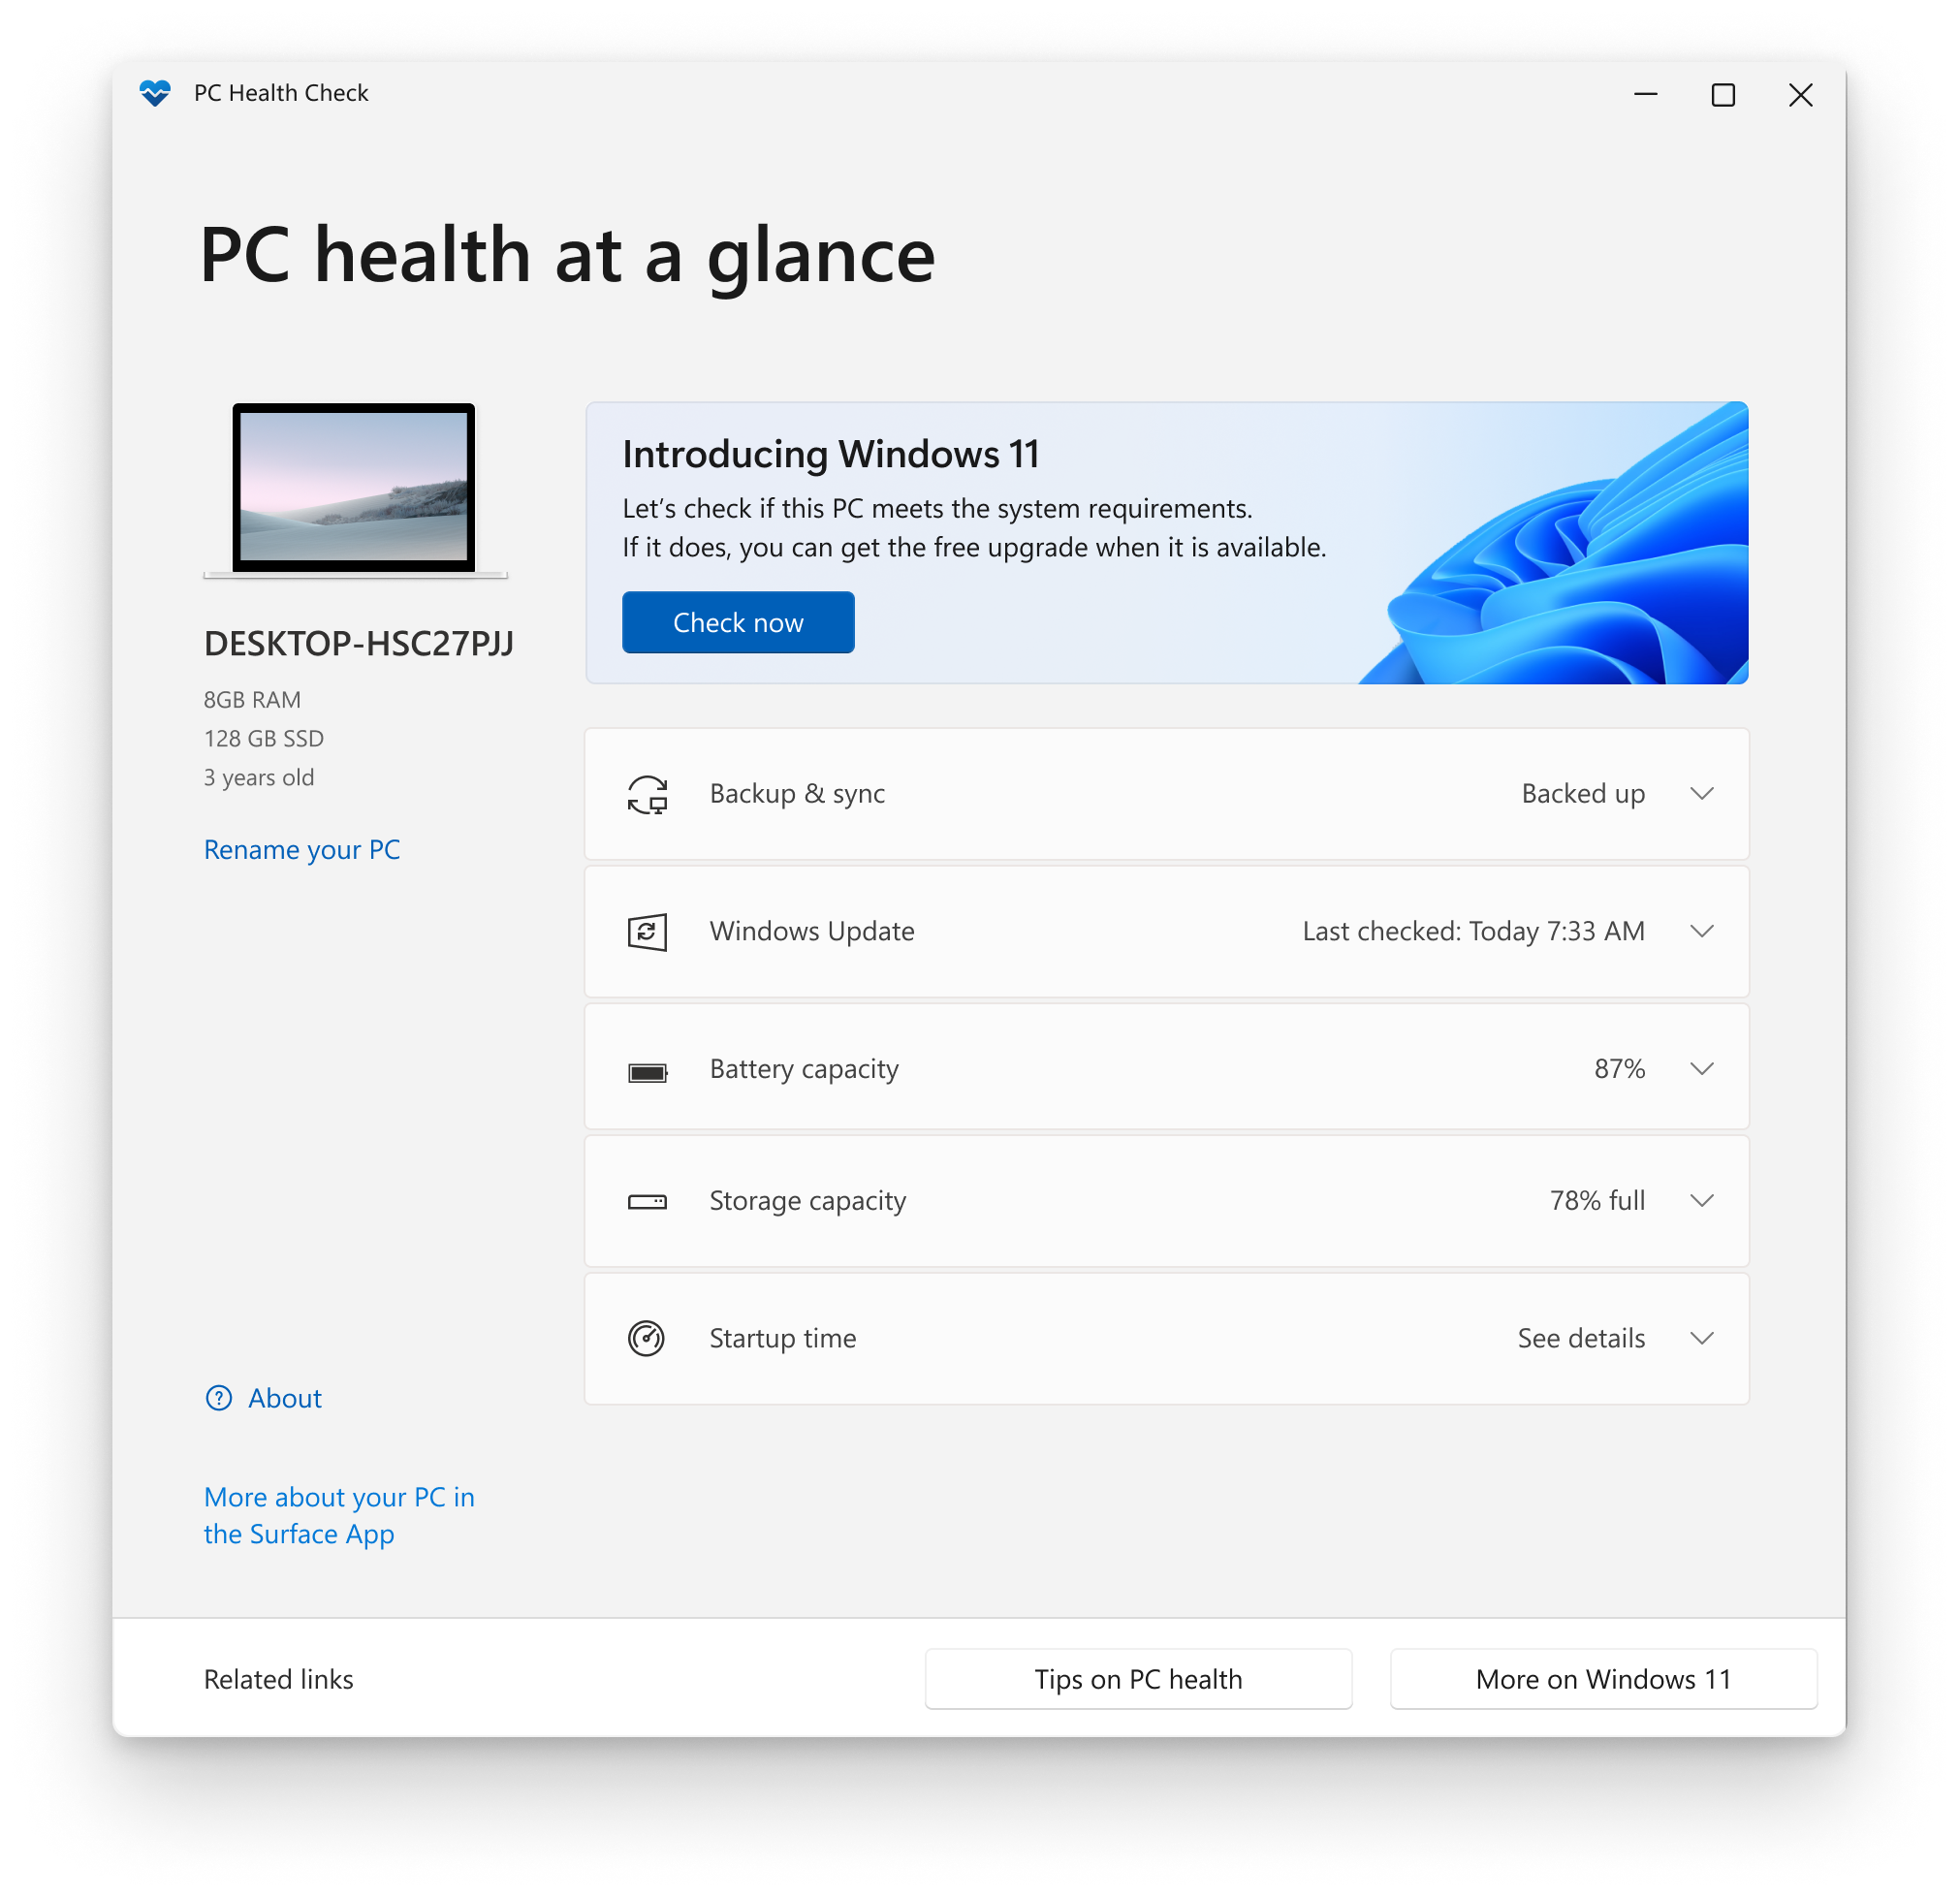
Now, here's a shortcut: If you already possess a valid key, you're in luck. No need to go through the whole checklist.
Head to Start > Settings > Update & Security > Windows Update and click on Check for updates.
If the stars align and your device is eligible for the upgrade, you can go ahead, hit that download button, and install the shiny new Windows 11. It's as easy as that!
How to install Windows 11 without TPM On Any Device?
If you're a devoted Windows 10 user like myself, here's the scoop: Windows 10 is no longer in line to receive those exciting new feature updates.
Yup, that means all the cool stuff they're adding to Windows 11 won't make it to your Windows 10 doorstep. The final act for Windows 10 was 22H2, and it didn't get any encore performances.
What is TPM & shoud you enable TPM on your device?
Trusted Platform Module (TPM), often overlooked but crucial for security, resides as a specialized chip within your computer. This unassuming chip holds the keys to safeguard your data.
When activating TPM, you're essentially adding an extra layer of security to your system. Think of it as the lock and key for your digital world.
Activating TPM ensures that potential malware remains locked out, unable to access your vital credentials, encryption keys, and sensitive user data.
It's akin to the biometric security on your smartphone – without the right fingerprint or facial recognition, access is denied.
So, should you enable TPM? Absolutely, but with a word of caution. While TPM serves as a robust defense against malware and tampering, it's not foolproof, and hardware can fail.
Enable TPM where it makes the most sense for your setup, but remain diligent with your passwords and thoroughly test how TPM behaves in your environment.
You may wonder why your computer comes equipped with a TPM chip by default, yet it's inactive until enabled in the BIOS. This decision doesn't impact your computer's functionality; the chip remains dormant until activated.
Once you flip that switch, you might notice a slightly slower boot-up process as the OS adapts to the newly fortified security.
Now, what if you were to disable TPM in BIOS? Well, it comes at a cost. Disabling TPM means sacrificing certain features, such as the Windows Subsystem for Android and the ability to install updates. It's a trade-off between convenience and security.
Speaking of versions, is enabling TPM 2.0 a wise choice? In the context of Windows 11, absolutely. TPM 2.0 stands as a crucial building block for security-related features in the OS, including Windows Hello for identity protection and BitLocker for data security.
In fact, upgrading from Windows 10 to Windows 11 necessitates TPM 2.0. However, if you possess at least TPM 1.2, there's a workaround – a clean install, which won't enforce the requirement. So, remember, TPM, when wielded wisely, can be your trusty guardian in the digital realm.
Sure, they'll keep sending bug fixes and security updates your way until its retirement date on October 14, 2025, but those snazzy PC hardware boosts and nifty Windows upgrades are off the table for Windows 10.

But hold up, you've got some time in the sun before the Windows 11 mandatory shift. So, all you Windows 10 enthusiasts, soak it up while it lasts.
Now, here's the lowdown on Windows 11. To get in on the action, your system still needs TPM 2.0 and Secure Boot in the hardware mix. But guess what? Right after the Windows 11 curtain lifted, tech enthusiasts discovered a cheeky registry hack that sidestepped these prerequisites, making the installation process a breeze.
So, here's the game plan. Step one: snag the latest version of Rufus. You can get it from the Microsoft Store, GitHub, or their official website. I'd recommend the portable version to skip the whole installation rigmarole. And, of course, you'll need the freshest Windows 11 ISO image file, which you can nab straight from Microsoft's official website.
Once you've got Rufus on your side, follow these moves:
- Fire up Rufus by double-clicking it in your downloads folder.
- When the UAC pops up, hit "Yes" to keep the party going.
- Plug an 8 GB or larger USB drive into your Windows 11-ready system. Rufus will spot it automatically.
- Click "Select" in the Boot selection area, locate that ISO file on your computer, and pick it up.
- Next, choose your Partition scheme. Opt for MBR if you're dealing with a BIOS or UEFI system. If you're planning to dance with a UEFI setup, leave the Target system and Partition scheme untouched.
- Scroll to the bottom and click "Start."
Now, in the Windows User Experience box, it's your playground. Check the box next to "Remove requirement for 4GB+ RAM," "Secure Boot," and "TPM 2.0."
Do the same for "Remove requirement for an online Microsoft account" and "Disable data collection (Skip privacy questions)." Then hit "OK." Rufus will give you a heads-up about wiping your USB drive clean.
